Showing posts with label Recipe. Show all posts

Tuesday, September 29, 2015

Vegan Banana Bread!


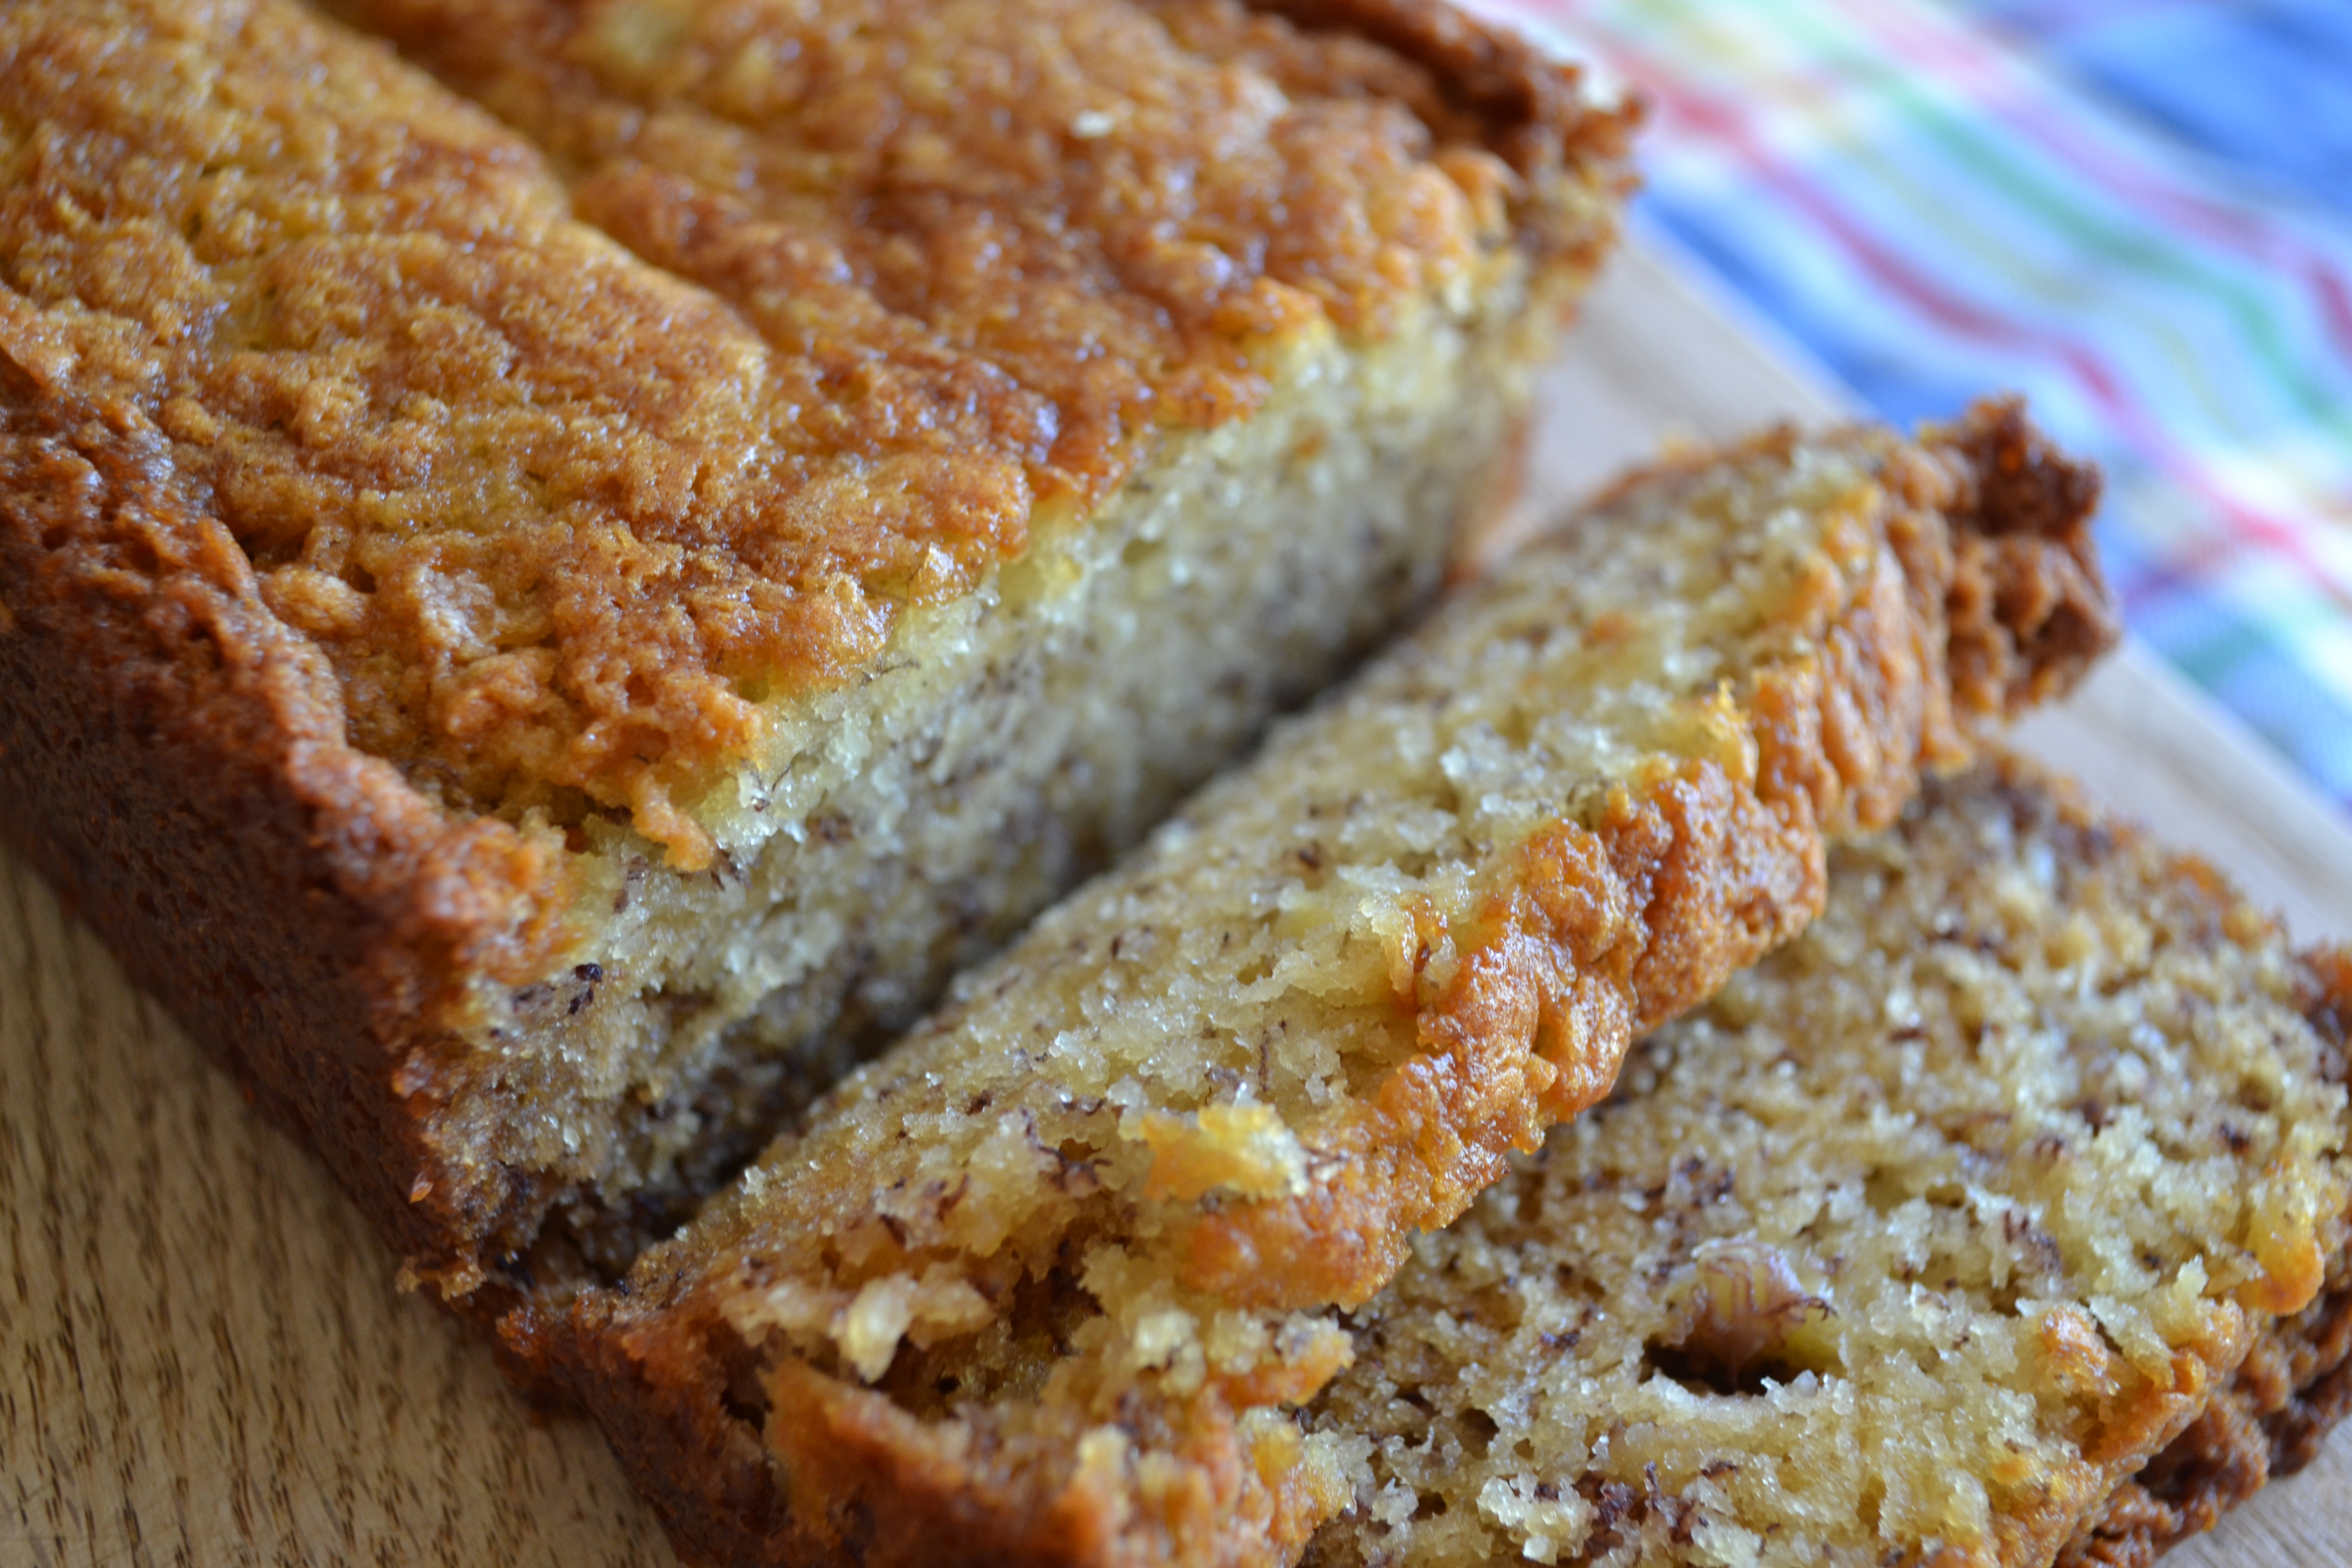
     This weekend I had the chance to do a lot of cooking in my new kitchen, and one thing I got to make was vegan banana bread! I've been making banana bread since I was 10 (it's a great way to get rid of really brown bananas), but this is the first time I've veganized the recipe and it came out tasting delicious, so I just wanted to share. This is a great option for those of you trying to use fewer animal products if you are concerned about the way industrially farmed animals are treated (for more info on this, read up here). 

Madeleine's Most Favorite Vegan Banana Bread:


Ingredients:
1 cup sugar
1/3 cup vegan butter, softened (such as Earth Balance)
1/2 cup applesauce (I use Trader Joe's Organic Unsweetened)
1 1/2 cups mashed ripe bananas (usually takes between 2 and 4 bananas, depending on size)
1/3 cup water
1 2/3 cups flour
1 teaspoon baking soda
1/2 teaspoon salt
1/4 teaspoon baking powder


Instructions:

1. Heat oven to 350 degrees fahrenheit and grease bottom only of a loaf pan, about 9x5x3 inches.
2. Mix sugar and butter in a large bowl.
3. Stir in applesauce until blended.
4. Add bananas and water and beat for 30 seconds.
5. Stir in remaining ingredients except for nuts until moistened.
6. Pour into the pan and bake for 1 hour, or until a knife inserted into the center of the loaf comes out clean.
7. Cool completely before loosening the sides of the loaf with a knife and slicing.
8. Enjoy!

Notes: 

- Try to source as many ingredients organically as you can! I use organic sugar and applesauce, and you can also use organic bananas! If you'd like to know why organic is better, you can read the first part of my food article series, here

- Speaking of the food series, Part 4, the final article in the series, debuts on Thursday. Don't miss it :)

Tuesday, July 28, 2015

Super Easy No-Knead Bread Recipe!

     Those of you who follow me on Instagram may have noticed that I triumphantly baked my own bread for the first time this weekend! It turned out great and it was super easy. I was originally going to follow this recipe, but some people in the comments were saying that certain steps weren't necessary. I ended up following the steps I've outlined below:

Ingredients:

6 cups bread flour (recommended) or all-purpose flour, plus more for work surface (Note: I used all-purpose and it worked fine)
1/2 tsp instant or active-dry yeast
2 1/2 tsp salt
2 2/3 cups cool water


Directions: 
1. In a large bowl, combine the flour, yeast, and salt. Add the water and stir until all the ingredients are well incorporated; the dough should be wet and sticky. Cover the bowl with plastic wrap or a clean towel. Let the dough rest 12-24 hours on the counter at room temperature. When surface of the risen dough has darkened slightly, smells yeasty, and is dotted with bubbles, it is ready.
2. Preheat oven to 425 degrees Fahrenheit. Place a 6-8 quart heavy covered pot, such as a cast-iron Dutch oven, in the oven as it heats. Sprinkle flour all over the risen dough, using a spatula or your hands to tuck flour down between the dough and the side of the bowl. You can also flip the dough to make sure the whole ball is covered in flour. 
3. When the oven has fully preheated and the dough is ready, bring out the pot and dump the flour into it, placing the side with any seams or wrinkles facing down. 
4. Cover and bake for 40 minutes. Uncover and bake for 10-15 minutes, until the crust is a golden brown. You can check the internal temperature with a meat thermometer; it should be 200 degrees in the middle. 
5. Remove from or leave in pot and cool on a wire rack completely before slicing. 

Slicing Tips:

- This can make two loaves of bread if you cut the bread in half and then slice each half up as a loaf. The second loaf can be saved for later use (apparently it freezes well) or given to a friend, which is what I did! 
- I find it easier to slice the bread by turning the loaf upside down, so that the bottom is on top and you can cut through the bottom first. 
- I recommend using a bread knife :) 

     That's it! Pretty easy, right? This is how I plan to supply my bread for the rest of my shopping ban, so I'm glad this recipe works so well. There are also some variations available in the recipe I linked to above, including Dark Chocolate Coconut, which sounds super yummy. I can totally see making that for a party. Happy Baking! 

                                                                       Love, 
                                                                           Madeleine

Tuesday, July 7, 2015

Chocolate-Peanut Butter Butter Cake


     Yes, this is as delicious as it sounds. I made this quite a while ago for Mother's Day, and I wanted to share it with you all because it is so. Good. I adapted the recipe from Recipes Food and Cooking (which is also where the photo is from) to make it more shopping-ban friendly :) Here you go: 

INGREDIENTS
Cake
  • 1 German Chocolate Cake Mix (or follow the "Cake" portion of this recipe, but using the amount of butter and egg indicated here)
  • ½ cup butter - melted
  • 1 egg

  • Cream Cheese Layer
  • 1 (8-ounce) package cream cheese, softened
  • 1 cup peanut butter
  • 3 eggs
  • 1 teaspoon vanilla
  • ½ cup butter, melted
  • 4 cups confectionery sugar

  • Chocolate topping
  • ½ cup chocolate chips
  • 1 tablespoon vegetable or canola oil
INSTRUCTIONS
  1. Preheat oven to 350 degrees, 325 degrees if using a glass pan.
  2. Combine the cake mix, egg and butter together. Beat until it is combined. Spray a 9 x 12 pan with cooking spray and then put the cake mix layer over the bottom. Pat it down.
  3. Combine the cream cheese, vanilla and peanut butter together until combined. Add the eggs one at a time and mix them in. Add the butter. When this is all combined together add the confectionery sugar. Spread evenly over the cake layer.
  4. Bake for about 50 minutes. I used a glass pan and it took just over an hour. The mixture will be puffed up in the center when done. It will jiggly just slightly. Remove from oven and let cool.
  5. Melt the chocolate for 1 minute in the microwave. Add the oil. Stir until combined. Spread over the top of the cream cheese layer.


Tuesday, June 30, 2015

Vanilla Scented Sugar Scrub Recipe!


    It's a fine day to make a sugar scrub! As promised by my Instagram post this weekend, here's the recipe for a vanilla scented sugar scrub, as well as little note about why it's great to make your own! The recipe was adapted from Thank Your Body and the photo comes from The Novice Chef. Although this recipe is different from the one pictured, that is just about what mine looks like. One thing that's good to note is that this recipe is a scrub for sensitive skin, since that's what I have. If you have oily or acne-prone skin, try looking at recipes specifically for your skin type. Without further ado, here's the recipe:

Ingredients: 

1/2 cup brown sugar
1/2 cup granulated sugar
1/3 cup coconut oil (although avocado, olive, and almond oil also work)
2 Tbs honey
¼ tsp pure vanilla extract (you could also use 5 – 10 drops of your favorite essential oil)
Directions:
Mix all ingredients in a small bowl until well combined.
To use:
Apply the sugar scrub to your face, neck and throat. For this you won't need much, only a scoop that's a bit smaller than a golf ball. You might even want to use some on your hands to slough off dry or dead skin. Be careful not to scrub vigorously. Use a circular motion and work the scrub into your forehead, cheeks, chin and neck. Avoid the eye area completely. This skin is delicate and should never be exfoliated with a scrub.
Rinse the face using warm water and finish with a nice cool splash of water to close pores.
Of course you can use this scrub on your whole body, too. Always finish with a cool rinse and pat skin dry with a clean towel.

    Here's mine if you missed my Instagram post (@thosegoodvibes95). I put it in an old cookie dough tub and made my own label from graph paper, markers, and packing tape. I keep mine in the shower for an easy rinse-off. 
Why It's Great to Make Your Own:

    Store-bought exfoliating scrubs are not created equal. Some use tiny pieces of apricot pit or similar organic matter (a la St. Ives, every teenager's favorite) as their exfoliating component, while others (ahem, Olay and Biore for starters) use tiny plastic beads to get the job done. The problem with that is that those tiny plastic beads wind up as water and environmental pollutants, and are very hard to keep track of. On top of this, both types of exfoliants, organic and plastic particles alike, come in disposable plastic bottles or squeeze tubes. This generates unnecessary waste, especially when you can make your own, out of ingredients you probably already have, and put it in a reusable (or reused!) container.
    Need some more reasons to make your own? This stuff is awesome. It smells super good, leaves your skin very soft, and you know what's in it and that every ingredient is safe to use on your body! What more could you want? Happy scrubbing!
                                                                             Love,
                                                                                Madeleine

Friday, June 19, 2015

Why I Stopped Using Deodorant (And Made My Own Instead)


      Today we're going to talk about deodorant, and how I don't wear it any more. Yep. Now if you're thinking "yuck!", hang on a minute! There are three excellent reasons why I don't use deodorant, so hear me out:

1. Toxins. The first reason I don't wear deodorant anymore is because it contains three potentially toxic ingredients: parabens, aluminum, and propylene glycol. Applying parabens and aluminum to the underarm area has been identified by some doctors as leading to risk of breast cancer. Propylene glycol is thought to be safe in small doses, but it is a neurotoxin that can damage your kidneys and liver. I'm not interested in toxins entering my body whatsoever, whether they cause cancer or not.

2. Packaging waste. Do you see how much plastic is wasted in each of those push up canisters deodorants come in? Nuh-uh. I'm not about to buy something that's mostly plastic, just to send most of that money to a landfill.

3. Money. I'm a college student, and a smart, frugal individual. I could buy natural deodorants that don't use toxic ingredients, but these cost more money than generic brands. Almost any way that I can save money, I will. Which is how I discovered a much more cost-effective solution….


You Can Make Your Own Deodorant!! 

    There are many recipes out there, but my personal favorite was introduced to me by one of my students this year. It only requires four ingredients (coconut oil, baking soda, cornstarch, and essential oils) and it smells and feels delightful on my skin. I also love the fact that I can make a huge batch all at once and put it in a reusable jar to decrease packaging waste! Plus, I love knowing exactly what is in the things I'm putting on my body and skin.

     Another alternative is to simply stop wearing deodorant! I've heard it takes 30 days before your body regulates and stops needing deodorant to keep from being smelly. Whether this is true or not, I went without deodorant for over two months, and I don't think anyone noticed (or at least they were all too polite to say something).

    I encourage you all to try experimenting with your deodorant regimen. Who knows, maybe you don't even need it? I hope this little piece of advice helps you all lead happier, healthier, and more sustainable lives. Happy experimenting!
                                                                               Love,
                                                                                   Madeleine

P.S. If you want more on this topic, I found this guy's experimentations with deodorant to be pretty entertaining, and useful!

Photos: mine, 2 (this link sends you to a wonderful tumblr archive of DIY deodorant recipes, just in case you want to look at other recipes!)

Tuesday, June 9, 2015

Literally the Best Cinnamon Rolls I've Ever Tasted: They Have A Surprise Ingredient!


You think I'm kidding, but I'm not. This cinnamon roll recipe will change your life. At least, for a few minutes. The secret ingredient is potato, by the way, and boy does it make a difference! The recipe and picture both come from Slate, and you can read all about why the potato makes these rolls so good on their site. Also, before we begin, I'd like to note that I did not use a ricer but instead grated the potato with a cheese greater, and it integrated just fine. Happy baking!
Surprise* Cinnamon RollsYield: 12 servings
Time: 3½ to 4 hours, mostly unattended
*1 small potato (about 4 ounces), cut into 1-inch chunks
1½ teaspoons salt
4½ cups flour, plus more for kneading and shaping
1 cup sugar
2¼ teaspoons instant yeast or one ¼-ounce packet active dry yeast
¾ cup (1½ sticks) butter, at room temperature
1 large egg
Oil or butter for greasing the bowl and pan
1 tablespoon ground cinnamon
2 cups powdered sugar
3 tablespoons whole milk
1 teaspoon vanilla extract
1. Put the potato in a medium saucepan with ½ teaspoon salt and enough water to cover it by at least 1 inch. Cover the saucepan, bring to a boil, and cook until the potato is very tender, about 15 minutes. Meanwhile, combine the flour, ½ cup of the sugar, the yeast, and the remaining 1 teaspoon salt in a large bowl.
2. Drain the potato, reserving 1¼ cups of the potato-cooking liquid, and put the potato through a ricer. (Discard the potato skin.) Add ¼ cup (½ stick) of the butter to the reserved potato-cooking liquid and stir until it melts. When the butter mixture cools to 100°F—about the same temperature as the inside of your wrist—add it to the flour mixture along with the riced potato and the egg. Stir with the dough-hook attachment of a stand mixer or by hand until combined.
3. Knead the dough with the dough-hook attachment of a stand mixer or by hand until it feels smooth and elastic, about 10 minutes, adding flour as necessary to keep the dough from sticking. Grease a large bowl (it’s fine to use the same one you mixed the dough in), add the dough, and turn it over to coat it lightly with oil or butter. Cover the bowl with a clean kitchen towel or plastic wrap, put it in a warm place, and let the dough rise until doubled in size, about 1 hour.
4. Grease a 9- by 13-inch pan with oil or butter. Punch down the dough, then transfer it to a floured surface. With a rolling pin, roll the dough into an approximately 8- by 12-inch rectangle. Spread the remaining ½ cup (1 stick) butter over the surface of the dough. Combine the remaining ½ cup sugar with the cinnamon and sprinkle this mixture evenly over the butter. Starting from one of the long sides, roll up the dough as tightly as possible. Cut the roll into 12 one-inch slices and arrange the slices, cut side up, in the greased pan.
5. Cover the pan with a clean kitchen towel or plastic wrap, put it in a warm place, and let the rolls rise until doubled in size, about 1 hour. (At this point you can refrigerate the cinnamon rolls for up to 12 hours or overnight; let them return to room temperature before baking.)
6. Heat the oven to 350°F. Uncover the cinnamon rolls and bake until golden brown, 35 to 40 minutes. Meanwhile, whisk together the powdered sugar and milk until smooth, then whisk in the vanilla. Let the cinnamon rolls cool slightly, then drizzle the icing over them and serve warm.

Monday, May 18, 2015

Vegan and Gluten - Free Mashed Potatoes!


Hi everyone! Today's recipe is from The Minimalist Baker, featuring some darn good Vegan Mashed Potatoes! I brought these to a vegan and gluten free potluck recently and they were devoured. I love the texture of them and they are definitely some of the tastiest potatoes I've had. 

INGREDIENTS
  • 6-8 medium yukon gold potatoes (if large, cut in half)*
  • 1.5 tsp sea salt
  • 1/2 tsp ground black pepper
  • 5-6 cloves roasted garlic (or sub minced garlic sautéed for 3 minutes in olive oil)*
  • 3-4 Tbsp vegan butter (such as Earth Balance), melted/softened
  • 1/4 cup fresh chives for topping
INSTRUCTIONS
  1. Place potatoes in a large saucepan or pot and cover with water. Bring to a light boil over medium-high heat, add 1 tsp of sea salt, cover and cook for 25-30 minutes or until very tender. They should effortlessly slide off a knife when pierced with a knife.
  2. While the potatoes are cooking, chop up your chives and measure your butter.
  3. Once tender, drain your potatoes and place them back in the hot pot off the heat for 1 minute to evaporate any additional water. Then transfer to a large mixing bowl.
  4. Mash your potatoes using either a potato masher or a hand mixer until fluffy. Note: Be careful using a hand mixer as you can overmix the potatoes and they can become gluey. It’s personally the method I prefer as I don’t own a potato masher. I just make sure not to overmix.
  5. Add in butter, garlic, salt, black pepper and stir to combine. Taste and adjust seasonings as needed.
  6. Lastly top with chives, stir and serve as is or your favorite gravy (or mushroom gravy). Leftovers will keep in the fridge covered for up to a few days.

Here's a picture of some of my students at the potluck!! They look so happy and healthy! 


Happy cooking!!! 
Madeleine

Monday, September 22, 2014

Chocolate Chip Cookie Cake


Hello, everyone. Today I am sharing a dangerously delicious recipe from Life, Love, and Sugar: the chocolate chip cookie cake. This deliciousness is addictive, trust me. I preferred it without the vanilla buttercream, but I included that part of the recipe just in case you al would like to try it. 
Ingredients
Cookie Cake
3/4 cup unsalted butter, room temperature
3/4 cup dark brown sugar
1/4 cup sugar
1 egg
2 tsp vanilla extract
2 cups all purpose flour
2 tsp cornstarch
1 tsp baking soda
1/2 tsp salt
1 1/4 cups semi-sweet chocolate chips OR about 1 cup of chocolate chunks

Vanilla Buttercream
1/2 cup butter
1/2 cup shortening
4 cups powdered sugar
1 tsp vanilla extract
2-3 tbsp water
Instructions
Cookie Cake
1. Cream butter and sugar together until light and fluffy, about 3-4 minutes.
2. Mix in egg and vanilla extract.
3. With the mixer on low speed, add flour, cornstarch, baking soda and salt.
4. Stir in chocolate chips. Dough will be thick.
5. Chill for at least 30 minutes or overnight.
6. When ready to bake, preheat oven to 350 degrees.
7. Place parchment paper into the bottom of your cake pan to help the cookie not stick.
8. Spread the dough out into the cake pan. Bake for 18-20 minutes or until the edges are slightly golden.
9. Remove from oven and allow to cool mostly in the cake pan, then transfer to cooling rack to cool completely.

Vanilla Buttercream
1. Beat the shortening and butter until smooth.
2. Slowly add 3 cups of powdered sugar. Mix until combined.
3. Mix in the vanilla extract and 1 tbsp water.
4. Add the rest of the powdered sugar and mix until smooth. Add more water to get the right consistency.


Friday, August 22, 2014

Easy Fresh Peach Cobbler


Oh man, this stuff is addictive. I've never truly appreciated peach cobbler until now. This recipe is so simple (it comes from here), but you can also make it a little more homemade with your own sugar cookie recipe for the topping. 

Ingredients
Fruit
to 10 fresh peaches, pitted, peeled and sliced (about 4 cups)
tablespoons sugar
tablespoons cornstarch
1/2 teaspoon ground cinnamon
Juice of 1 lemon (about 3 tablespoons)
tablespoons butter, softened

Topping
pouch sugar cookie mix
1/2 cup butter, softened
teaspoon almond extract or vanilla
egg

Directions


1. Heat oven to 375°F. Spray 13x9-inch (3-quart) glass baking dish with cooking spray. Place peaches in dish. Sprinkle sugar, cornstarch, cinnamon, and lemon juice over peaches; mix lightly with spoon until coated. Dot top with 3 tablespoons butter.


2. In large bowl, mix topping ingredients with spoon until soft dough forms.


3. With hands, shape golf ball-sized balls of dough into 1/4-inch-thick disks. Place disks over peaches, covering most of the top. (With any remaining dough, make and bake cookies.)


4. Bake 25 to 30 minutes or until topping is golden brown. Cool 10 to 15 minutes before serving. Enjoy!


Friday, July 25, 2014

No Bake Peanut Butter Chocolate Bars


HOLY YUM!  I brought these to a class potluck yesterday and everyone went nuts over them! {Get it? Nuts? Peanut Butter? Ayyyy ;)} These are super easy to make, and are great for summer since they require no oven time, plus they only have five ingredients! The recipe comes from Sally's Baking Addiction! YUM!

Ingredients:

1/2 cup (115g) salted butter, melted (you can also use unsalted, just add in 1/4 tsp salt with the peanut butter)
- 1 cup graham cracker crumbs (about 8 full sheets)
1 cup (120g) confectioners' (powdered) sugar
- 3/4 cup + 2 Tablespoons (215g) creamy peanut butter (not natural style)
1 cup (180g) semi-sweet chocolate chips

Directions: 

1. Take 8 sheets of graham crackers and put them in a zip lock bag to crush. Meanwhile, melt the butter in the microwave. 

2. Line a 8x8 or 9x9 square baking pan with aluminum foil. Set aside.
3. In a medium bowl, mix the melted butter, graham cracker crumbs, and powdered sugar together until combined. Stir in 3/4 cup of peanut butter. Spread into prepared baking pan.
4. In a small bowl, microwave 2 Tablespoons of peanut butter with the chocolate chips until melted. Stir until smooth. Spread over peanut butter layer.
5. Chill until completely firm, at least 3 hours (I chilled it overnight). Allow to sit at room temperature for 10 minutes before cutting. Bars stay fresh stored in the refrigerator.  Serve chilled. Enjoy!


Wednesday, May 21, 2014

Simple Bacon and Corn Griddle Cakes


This morning I made bacon and corn griddle cakes for breakfast, and oh man, were they delicious. With the help of my co-chef, we whipped these out and had a regular feast this morning. I highly recommend these for a brunch, as they're an excellent combo of sweet and savory with warm honey on top. The original recipe and photo come from Recipe Girl. I tweaked the recipe a bit to make it more simple but it still tastes delicious!

Ingredients:

8 slices bacon, cut into 1/2-inch pieces
1 cup all-purpose flour
1 teaspoon baking powder
1/2 teaspoon salt
2/3 cup milk
1 large egg, beaten
1 tablespoon canola or vegetable oil
1 cup frozen, canned or fresh corn
1/2 cup shredded Monterey Jack cheese
warm maple syrup or honey, for serving

Directions: 

1. In a medium skillet, cook the bacon pieces until they begin to brown. Continue to cook until the bacon is crisp.
2. While the bacon is cooking, combine the flour, baking powder, and salt in a medium bowl. Stir in the milk, egg and oil, just until moistened. Stir in the bacon, corn and cheese. The mixture will be thick. If you'd like the griddle cakes to be slightly thinner than those pictured, add a little more milk to thin out the batter.
3. Heat and grease a griddle or large skillet. Pour a heaping 1/4-cup of the batter onto the griddle and cook until it is golden brown- 3 to 4 minutes per side. Repeat with the remaining batter.
4. Serve stacks of griddle cakes topped with a good dose of warm maple syrup (or honey!). Enjoy!
Notes:
- I'm not a fan of syrup, so I used warm honey instead and I found it really brought out the flavor of the cheese, bacon, and corn in the griddle cakes. 
- I followed the recipe exactly and my griddle cakes were very thick. I might add a bit more milk next time, but that's up to you!
- I purchased frozen corn, the kind that comes in a bag that you can steam it in, and microwaved it for 1 minute before adding it to the mix, just to thaw out the kernels. 

Sunday, March 23, 2014

Salted Caramel Butter Bars


YUM! These bars are probably one of the best things I've made in a while, so they are definitely worth sharing with you all. I made them for a church function as a favor for my mom, and they were gone in 20 minutes! The original recipe, as well as the photos, come from Pip & Ebby. Hallelujah for this recipe!

Ingredients:

4 sticks of butter

1 cup white granulated sugar

1 cup powdered sugar

2 tablespoons vanilla extract

4 cups all-purpose flour

14 oz. unwrapped caramel candies

1/3 cup heavy whipping cream

1/2 a teaspoon vanilla

1 tablespoon kosher or sea salt


Directions:

1. Preheat your oven to 325 degrees F

2. In a large bowl, combine the butter (at room temperature) and powdered and granulated sugar. Beat together with a hand mixer until creamy. Then add 2 tablespoons vanilla and blend in.

3. Gradually add the flour to the mixture, until a soft dough forms.

4. Spray a 9x13 baking pan with cooking spray and press half of the dough into the bottom of the pan to form a crust. Bake this for about 20 minutes, until edges are golden. Place the remaining dough in the refrigerator. 

5. Combine the caramels, whipping cream, and 1/2 teaspoon vanilla in a microwaveable bowl. Microwave on high for one minute and then stir. If mixture is not smooth, microwave for 30 second intervals, stirring in between until smooth.

6. After crust has baked and cooled for 15 minutes, pour caramel mixture over crust, sprinkling with sea salt. 

7. Take the excess dough from the refrigerator and crumble over the caramel to form the top. Bake until lightly golden, about 30 minutes. Cool before cutting into squares. Now, enjoy and indulge!


Friday, March 7, 2014

Oreo Cookie Bark


I made Oreo cookie bark a while back for a roommate's birthday, and it was pretty good. I wanted to share the recipe for my fellow Oreo lovers out there. The original recipe comes from Bakers Royale, as does the picture. 

Ingredients: 

2 bags (I believe they are each 10 oz) of white chocolate chips

1standard sized box of Oreos


Directions: 

1. Spray a baking sheet with cooking spray. 

2. Melt the chocolate in a double boiler over low heat, then remove and cool for about five minutes. 

3. Add in at least fifteen crushed Oreos to the chocolate. 

4. Pour over the baking sheet and top with more crushed Oreos.

5. Place baking sheet in the freezer to cool


Tips & Notes:

- This recipe doesn't really have to be exact

- You can make a double boiler by boiling a pot of hot water and placing a bowl over the mouth of the pot so that it fits inside without falling in completely, then placing the chocolate inside the bowl


Monday, February 17, 2014

Banana Choco-Peanut Butter Ice Cream

this photo is not mine!!

Yesterday I made banana-chocolate-peanut-butter ice cream!! Does that sound good or what? The best part is that there are only three ingredients. All I used to make this are bananas I took from the dining hall, Nutella, and peanut butter. I also enlisted the help of a freezer and a blender. Yum! 

Note: this recipe is for about 2 servings, at least from my point of view. Maybe you eat more ice cream than I do!

Ingredients:

3 bananas
2 tablespoons peanut butter
2 tablespoons Nutella

Directions:

1. Peel and slice the bananas into small discs. Place them on a plate of cookie sheet and freeze until solid (I just left them overnight)

2. When they are frozen solid, take the banana discs and blend them in a blender until you reach a creamy consistency - kind of like frozen yogurt. This will probably took a while, it took me about 30 minutes. 

3. Add in two tablespoons of Nutella and blend until evenly distributed. Add in two tablespoons of peanut butter and do the same. 

4. At this point, you can either serve it how it is or put in a container and freeze it a little bit to make it more solid. Enjoy!!


Saturday, February 8, 2014

Mac 'N' Cheese Pizza


I made this last week for my roommate's birthday and OH MY GOD IT IS SO GOOD. It's the perfect food for any college student/hungry boyfriend or girlfriend/hungry potential boyfriend or girlfriend, and whoever you feed it to will undoubtedly want to hug you several times and ask you to make more ASAP, so just be warned. The original recipe, and the photo, come from The Gunny Sack. Y'all ready for this? Let's get our pizza game on:

Ingredients:

1 pre-made pizza crust (I used Pilsbury's in a tube)

1 box of mac 'n' cheese (I used Annie's. You will also need the ingredients specified on the box, usually this means a little milk and maybe some butter.)

3 slices cheddar cheese

1/4 cup milk

1/4 cup olive oil

1/2 cup shredded cheese

Directions:

1. Begin by making the mac 'n' cheese as directed on the package

2. Add 3 slices of cheese and 1/4 cup of milk and stir over low heat until melted. 

3. On a cookie sheet or pizza pan, lay down the prepared crust. The Pilsbury kind recommends pre-baking for 5 minutes, so I did that, which made the final baking time shorter. 

4. After pre-baking your crust if you need to, brush with olive oil, top with mac 'n' cheese, and sprinkle with shredded cheese. 

5. Bake for 7-10 minutes, watching to make sure it doesn't burn. 

6. Enjoy, serve, and make instant best friends. 


Monday, January 27, 2014

Cupid Cookie Bark


Hey guys! I made this delicious recipe for my roommate's 19th birthday party, and the original recipe (as well as the photo) comes from here. This was a total hit!

Ingredients:

14-20 Oreos, broken up
1 and 1/2 Cup of pretzel sticks, broken up
1 lb white chocolate (I actually used more than this, it depends on what size of cookie sheet you want to use)
1 package Valentine's themed candy corns or M&M's
Pink or red sprinkles

Directions:

1. Cover a large cookie sheet with wax paper or cooking spray

2. Spread broken cookies, pretzels, and about 3/4 cups of M&M's or candy corn. 

3. Melt white chocolate in a bowl set over a small saucepan of boiling water (you can also use the microwave, but I find this method is less likely to lead to burnt chocolate, which smells disgusting). Keep stirring until melted. 

4. Drizzle the melted chocolate over the cookies mixture on the baking sheet, spreading with a spatula. 

5. Sprinkle remaining candies and sprinkles over still-warm chocolate. 

6. To harden quickly, stick the baking sheet in the freezer and wait until hard. Then you can pull it out and break into chunks. Store in the freezer, fridge, or at room temperature. 

Thursday, January 9, 2014

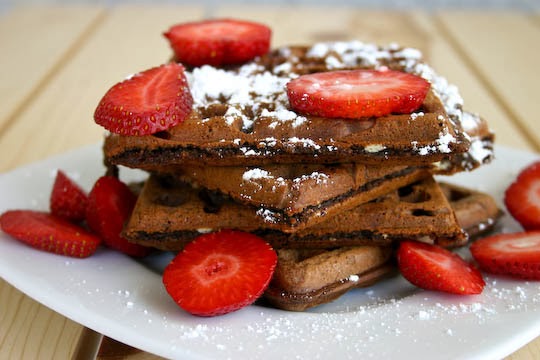
Chocolate Cake Mix Waffles!


I made these for my roommate's birthday a little while ago and they were so, so good. 
I topped them off with some vanilla cake icing and some peanut butter, but they are also good with strawberries like the picture above!

Ingredients: 

1 box chocolate cake mix

1 1/3 cups water

1/3 cup vegetable oil

3 eggs

(You will also need a waffle iron, otherwise you could try making chocolate pancakes!)


Directions:

1. Heat your waffle iron and spray with cooking spray if it isn't non-stick. 

2. Make cake batter by mixing above ingredients.

3. Make those waffles! Be careful not to pour in too much batter, 'cause it gets messy if you do. Also, it should take 3 to 5 minutes for the waffle to be ready, or until the steaming stops. 

4. You can serve these hot or cold with whatever toppings you choose. They are very yummy just out of the fridge!

Tuesday, December 17, 2013

Better Lemon Bars!


A little while ago, I posted this lemon bar recipe. However, I tried a new recipe for Thanksgiving, and the results were so much tastier that I thought I'd post this recipe as well. 
This comes highly recommended by me. It's an excellent light dessert that contrasts with the heavier holiday sweets, so I bet if you made these for a Christmas occasion, you'd be well-loved by all the guests! Here's the recipe. 

Ingredients:

For the Crust

1 cup all-purpose flour

5 tablespoons unsalted butter, melted

1/4 cup confectioner's (powdered) sugar

2 tablespoons skim milk

For the Topping

1 cup granulated sugar

3 tablespoons lemon juice

2 tablespoons all-purpose flour

1 large egg

2 egg whites

1/2 teaspoon baking powder

Confectioner's sugar for garnish

Directions:


1. Preheat the oven to 350 degrees F. Spray an 8 inch square baking pan with cooking spray. 

2. In a medium bowl, prepare crust by combining flour, butter, and confectioner's sugar. Mix well. Pour in milk while stirring, until dough is able to be gathered into a ball. 

3. Pat dough evenly into the bottom and 1/4 inch up the sides of the pan. Bake for about 20 minutes, until crust is golden. Then take out of the oven and cool for 5 minutes. 

4. To prepare the topping, in a medium bowl, combine sugar, lemon juice, flour, egg, egg whites, and baking powder. Mix well. 

5. Pour topping over cooled crust. Bake for about 20-25 minutes until top is set. Cool completely and dust with confectioner's sugar. Cut, serve, and enjoy!