
Hey everyone! Today I am so so excited to feature this awesome guest post tutorial on how to make a crystal circlet, made by Jazmin from Viva La DIY! Read on and create awesomeness with her!
If you’re anything like me, you are constantly finding inspiration for DIY projects everywhere! One thing I have been really marveled by recently are crowns and circlets. These beauts are exquisite yet pricey. So when I discovered just how expensive they are, I knew that I would DIY my own version.
I really enjoyed how my circlet turned out. I can really feel the female energy from the stones!
Amazonite (also known as green feldspar) is considered to have many healing properties, such as relieving headaches, has a calming effect and helps with mood swings. Amazonite is also believed to possess a female energy.
Rose quartz is believed to help relieve pain and considered to strengthen friendships and relationships because it opens the mind to beautiful things.
First, explore various types of styles and designs to consider. While preparing I looked at many different styles including Elvin, Medieval, Bohemian, and Steampunk. I wanted it to look nature inspired but, not too avant-garde. So I finally decided I wanted something simplistic with an Elvin/Bohemian aesthetic.
This is just what I choose. You are free to follow these techniques along with your own design. It is completely up to you, choose what is best for you and your budget.
Materials:
- Measuring tape
- 20 gauge wire
- 12 gauge wire
- Wire cutters
- Needle nose pliers
- Other jewelry pliers are a plus (My husband wraps stones so I used some of his tools.)
- Crystal beads and stones (I used real amazonite and rose quartz, but plastic ones are fine.)

Step 1:
Measure your head and add 2 inches.
(My head measures 22 inches, plus 2 for total length of 24 inches.)
(My head measures 22 inches, plus 2 for total length of 24 inches.)
Step 2:
Cut your 12 gauge wire equal to the total length of this measurement. Repeat for a total of 4 pieces.
Step 3:
Take 2 pieces of wire and intertwine them together by holding the ends and twist like a candy wrapper. Repeat for a second strand.

Step 4:
Take both strands and twist them 2 inches from the end.

Step 5:
Make your first loop approximately 1 inch from where you left off. Use your thumb to hold between the loop and twist twice to secure in place.

Step 6:
Similarly, make second loop approximately 2 inches in length.
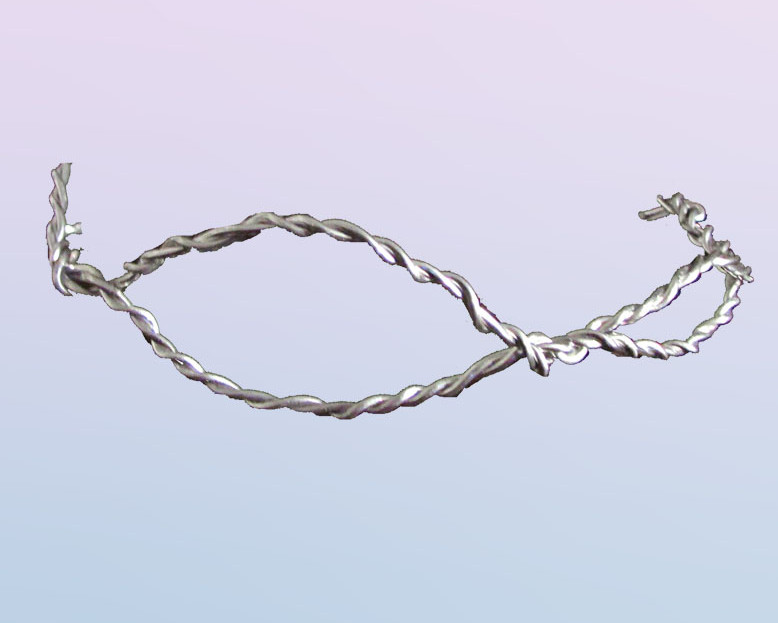
Step 7:
Continue to make a third loop approximately 3/4 of an inch in length.

Step 8:
Now make a fourth loop of about 3 inches in length.

Note: To preserve symmetry, subsequently repeat the loop sequence.
Step 9:
Respectively repeat step 7, 6, and 5. Then twist the remaining wire and fold over the ends so that no sharp wire sticks out.

Step 10:
Twine the largest center front loop strands around themselves until taut.
Again, I used my thumb to twist the wire like a candy wrapper.
Again, I used my thumb to twist the wire like a candy wrapper.

Note: Reference Make a Tiara, Threadbanger Project to learn how to play with the beads and make interesting shapes.
Step 11:
Thread your bead(s) with 12 gauge wire.

Step 12:
Wrap any loose stones with 20 gauge wire.
Note: Since rough cut stones are easier to wrap than polished stones, I recommend using rough cut stones for beginners.

Step 13:
Secure your bead(s) and stones in place as you find aesthetically pleasing.

Step 14: Add any final touches and you are finished.

Have fun, hope you have a blast making your own!
Links:
Thanks again to Dulce and Jazmin for this awesome DIY tutorial. I really encourage you guys to peruse their links above and check them out; they are truly inspiring!
Happy circlet-making!!
No comments:
Post a Comment
I appreciate your comment! I always read and respond :)